Showing posts with label Foundation. Show all posts

Bobbi Brown Natural Finish Long Lasting Foundation SPF 15

Available in 20 Shades.Perfect for oily and normal/combination skin.
Offers...
Balancing
This oil-free formula hydrates and controls shine where you need it. Sponge-like powders
absorb excess oil on the surface of the skin, while emollients lock in moisture to ensure
skin stays perfectly balanced.
All Day Wear
Transfer-resistant formula helps create a barrier against heat and humidity for 8 hours of
wear. Even in the most humid climates, makeup stays in place.
Natural, Soft-Matte Finish
This new formula contains an oil-free emulsion system that delivers a blend of finely milled
pigments, spherical powders, and mica for natural-looking coverage.

Smashbox Halo Hydrating Perfecting Powder : Review

A few weeks back I received this wonderful email from reader Reehana. She introduced me to some of her makeup favorites and among them was the Smashbox Halo Hydrating Powder. I've been a big fan of the product since December. But before I tell ya why I love it, listen to what Rehaana had to say ...

"Smashbox halo powder is another miracle worker for me. Give it a few minutes to settle into your skin and it makes your face just glow. I don't have great skin but this stuff works so well for me that people (by people I mean overly nosey aunties who like to invade your personal space and loudly ask you awkward questions in large crowds) have been accusing me of having the "pregnancy glow." I suppose it doesn't help that I recently got married so everyone is already checking their watches, lol. Aaaah, desis..."

LOL !

I got a sample of the powder along with the Perfect Complexion kit (Medium) that was released during Christmas last year.

Can ya believe its February already ! Time is doing more than flying...

My Thoughts

If you

hate the heavy feeling of makeup,
or are new to makeup
or hate the white cast that come from most translucent powders...

you have got to try the Halo powder . Its lighter than feather and vanishes onto your skin leaving behind a softly iridescent finished face. I use it over my liquid foundation in place of translucent powder. Given how sheer it is , I may not recommend it for coverage as such. But if you have fairly clear face and just need a finishing touch grab this pronto !

I've worn this on days when my skin was super dry and drenched with moisturizer and loved the semi matte, barely there coverage. I also use it to set my concealer, where a powder as light as this is perfect coz it doesn't alter the texture around the eyes. Some powders suck up all the moisture and make my eye area dry and flaky.

The design is a hit with me. I am the worst when it comes to storing loose powders but find pressed powders too heavy for a light makeup kinda days. So, this built in shaver has my heart.

More On The Product

The product is said to be great on mature skin. Some statistics mentioned on their site are : after 10 minutes there is a 33% decrease in the appearance of wrinkles around the eyes. And after 6 weeks of use, there is a 67% decrease in the appearance of fine lines and wrinkles overall.

The formulation consists of pure gold, 48 minerals, 11 amino acids and a powerful peptide that are said to deliver powerful anti-aging benefits while their patented hydration system continuously revitalizes skin for a brighter, more radiant complexion all day.

The Halo powders are all Oil-free, Talc-free, and Paraben-free & come with a custom Kabuki brush and a sample of the Photo Finish Foundation Primer.

Overall though I cant say much on the anti aging benefits, I love it for it does !

In Other News

Did you have a good Valentines day ? Relaxed and pumped up to start the week ?

I had one of the greatest times ! Will put up some pics soon but lemme tell you this - I almost touched a giraffe , got face to face with a zebra, got scared $hit by an antelope and five feet away from a leopards ! One of the most surreal experiences a city girl can have !

I am in love with this song by Lady Antebellum ...yay for country singers !


Love,
Indian Girl

Give Your Foundation An Energy Boost - It Makes The World A Warmer Place

I kid you not. This is about giving your foundation a much needed energy boost.

Which in turn gives your face a shot of something like Emergen C.

Which in turn makes you look & feel warmer and radiant.

Which in turn makes the world a warmer place.

Which is all we want.

This should be called the ripple effect.
Makes science so much more interesting.
To kick off this glorious cycle you begin by placing a dose of gel or creme bronzer on the back of your hand. Now adjacent to the bronzer you place a dose of your creme liquid foundation.

Mix it and spread it all over your face and neck. I simply use my fingers.
Clean ones only.

The products that work for me are St. Tropez Radiance Mousse and Becca Luminous Skin Color.

The St. Tropez Radiance mousse is some good stuff bro.
You've gotto try it bro.
You've got to bro.

Sorry. That's my Jersey Shore withdrawal syndrome ...

I love my Becca foundation but I always thought it missed a little something. A bit of warmth may be ? And somehow adding bronzer to it makes a huge difference in how pretty it looks.

This is also a great way to warm up your winter foundation for spring.
Nobody wants to look pale in spring ! GLT baby. GLT !

Love,
Indian Girl

Reader Question : How To Make Your Makeup Stay On All Day

This question is from Farheen.

"Hi there! My biggest problem is How do I make my makeup stay all day? It seems that when I put it on and its fresh it looks fabulous but through the day my concealer starts to wear off a bit and the makeup seems worn out at the end of my workday. Would really appreciate if you could give some suggestions."

Hi Farheen !

Sorry it has taken me a while to get back.

For makeup to stay on all day the key is layering. This is my routine when I want my makeup to be perfect all day long. I give a one minute break between each step so the product has time to sink into my skin and get comfortable there.

1. Start with a clean face

2. Apply an oil - free moisturizer. If you use sunscreen apply it over the moisturizer.
I love Clinique Dramatically Different Moisturizing Gel or Clean & Clear Moisturizers. As for sunscreens look for oil free ones. I like Clinique Face Cream SPF 30.

3. Apply a mattefying face primer all over your face and on / under your eyes.
This is a list of popular primers that can be used on eyes. I love the primers from SKINN. Sally Hansen Natural Beauty makes a good luminizing primer as well.

4. Use oil free foundation over the primer whenever possible for long stay. Apply your concealer.

5. Set the concealer with translucent powder.
The setting is important - it adds another layer over your concealer. This way the first thing to disappear will not be your concealer, it is the translucent powder. And from inside out the primer keeps the natural skin oils from completely ruining the concealer. Same goes for foundation as well.

6. Apply your blush, eye makeup and lipstick.
Go a little heavy handed with the blush and blend it out with translucent powder. If its too sheer to begin with - its not gonna last the day. Alternatively you can also layer the blush by applying a cream blush under your powder brush. The creme blush layer will be really thin so there is no way its gonna get paste like.
I like using Jouer Creme highlighter in Tiare under my blush. The formula is very light and helps the powder blush adhere better.

7. Set your makeup now with translucent powder.
Sometimes I use powder foundation over my liquid foundation with a light hand and then apply translucent powder over it. Layering is key for long wear. But its also important to use a light hand so the makeup does not look cake-y and too much.

8. If I'm having a dry skin day...
I set my concealer with a little translucent powder and set my face with a setting spray / face mist. I like Clinique Moisture Surge. But I love Amore Pacific Moisture Bound Mist

All my fellow readers / makeup enthusiasts - I'm sure you guys have super awesome tips or may be you do things a different way! Share what works for you. Lets help Farheen out here !


Love,
Indian Girl

RAW Minerals Discovery Kit. : Review. Everything You Need But Do You Really Need Everything ? And A 50 % Discount Offer !!!

Hiya Ladies !

This morning I set out writing a post on Boys but then I got into other things and never finished it. I then figured we need a dose of it on any given day. So I'll be sure to post it on Wednesday - just when you need it the most.

Or I .

Instead lemme get to a story on foundation. I thought it would be a great followup, now that we have shared a few tips on how to apply foundation better.


I've been testing out the RAW Minerals Discovery Kit for a while now. I used it for a couple of weeks, took a break during the dry skin period and went back on it once my skin was back to normal. Been back on it for a couple of weeks now and its all been good !

The RAW Minerals Discovery Kit comes with 7 items

Two Different Foundation Shades
Mineral Glow
Active Veil SPF 18
Concealer Brush
Multi tasking Retractable Brush
Maximum Coverage ( Flat Top) Foundation brush

The Foundations

I went with the Medium Kit. The kit came with two foundation - L3 and M1.

M1 is just the perfect shade that matches my skin tone. Especially my chin which is notorious for being a shade darker than rest of my face. I love the choice of having two foundations. We can either mix the two together to make a suitable shade or you do what I do. I use M1 on my whole face and then dust L3 lightly on the center of my face. My eyes, extending it to the top my cheekbones , nose and center of the chin. The result is the JLO like effect. The one where she looks bright and awake !

I love the foundation a bit more than my Clinique powder foundation. Its like adding a dose of Vitamin C to my face. Just pumps it up, infuses it with energy and warmth. I find most powder foundations dull and anything but exciting. This one is different. Mostly because it doesn't cake up in four hours to make me look like a cracked doll. What you see at the beginning of the day is almost exactly what you will look like after eight hours. That, that to me is magical !

PS : Ignore the fact that I just called myself a doll ! Good God what have I come to !

L to R : Nekkid skin, One layer of M1 , Two layers of M1 + bronzing powder

The Others

The Flat Top Brush is very good at laying the foundation and blending it into the skin. It feels light and stays on for hours. I do use a primer underneath (Smashbox Photofinish Oil Free Primer). Personally I think a primer is necessary for powder foundations. Just as much as bread is to a good sandwich.

The Mineral Glow is a bronzing powder and is just as good as the foundations. You know I cannot live without bronzers and my light olive oil mayo. But that's another story for another time.

The Active Veil is a setting powder with SPF 18. Though the power of powder SPF's is debatable, I would any day choose one with it than one without it. It being SPF. Though the powder looks white-ish, it is a translucent powder and doesn't make skin look any bit lighter.

But Then....

Yeah there are a few but thens...

The retractable brush is not great. The retractable part is great . The brush part is not. I would have loved it if they use the same material they used to make the flat top brush. Now that one is fab !

You order online so there isn't a chance to try it out forehand.

You must have a good understanding of what your skin tone is. Most of us have an idea. It could be the wrong idea. Just saying...

I lucked out when I ordered Medium. The photos on their site helped me. But mostly its the several foundation runs I've done in the past years to Sephora and Nordstrom that have given me a good understanding of my skin tone. I strongly suggest spending the rest of the weekends this year at Nordstrom . Its a good lesson to learn.

It comes in a sifter jar. I dislike sifter jars with a passion.

And then there is the question of what if ? What if you didn't want the other shade ? Just the one shade is working wonders - I'd rather have two of this one ! Not possible.

The kit costs $180.
It is all natural, mostly organic product. Still $180 ?

Each foundation box contains 2g (0.07 oz) of product. We get two of these foundations in the kit. If bought individually each costs $30. Though it is an all natural mostly organic product, I am not sold on the price. My Clinique Super Balanced Makeup Mineral Foundation has 17 grams (0.63 oz) of product and costs $34.50. And it comes with a futuristic grinder that shaves the right amount of foundation for me.

Told you, I love gadgets !!

But Just For You Offer

The folks at RAW Minerals have a wonderful offer for AIMB readers. You can now order the kit for $90 . That is a 50% discount ! Not 10 or 15 or even 20. A full 50 percent !!

And...FREE shipping too !

All you have to do is use the promotion code DISCOVERY50 during check out. There is no minimum amount of purchase required for this code. You can order anything and use the code for it.

This essentially brings down the average price of each product in the kit form $25.71 to $12.85. And if we get only the foundation, it will be for $15. And $15 only. Yay for free shipping !

Offer ends on 12/31/2009

Dinner Table Conversation

The kit was sent to AIMB to be considered for a post. I have been sent a few mineral foundations from different brands in the past but they never made it because they weren't fun or exciting. This one was fun and hence I write about about it.

You can now give it a go at $90 but what about later ? Later when you are as addicted to it as I am, would you pay $30 to get 2 grams of your foundation fix ? Just something to think about when you're having lunch this afternoon. Or dinner. Its a great topic for dinner table conversation !

I think so.

Which reminds me, I need FOOD now .

Love,
Indian Girl

Help ! My Foundation Goes On Cakey. 12 Steps To Help Apply Foundation Better


1. Wet the sponge . Use a damp sponge. Never use a dry sponge.

2. Use a water spray / water mist before applying the foundation and after the whole routine is done.

3. Before applying foundation - Exfoliate the dry patches. Moisturize your face well. Let the moisturizer sink in.

4. Practice at home when you are under no pressure to look your best under five minutes. Try different ways of getting it right. Don't worry about how long it takes you because with time you will be doing all that in two minutes.( or more)

5. Use heat / blow dryer over creme foundation cake. It makes the cake more moist and delicious. Err...foundation more smooth, pliable and easy to work with.

6. If you have very dry skin avoid powder foundation. Just like you avoided your ex-boyfriend at that party last year.

7. Lightly pat gel moisturizer over the foundation on extra dry and peeling areas.

8. If you have very oily skin - blot blot blot. Blot after applying moisturizer. Blot before applying foundation. Blot after applying foundation. Set with powder and blot.

9. Sheer out the full coverage foundation with your moisturizer and slowly layer them instead of one thick layer. That one thick layer is cakey and heavy. Layering helps. Like a lot.

10. Try different brushes - stippling / skunk brush ( MAC 187), fluffy foundation brush ( MAC 138), the classic foundation paint brush. My personal favorite is the sponge - magical & cheap.

11. Give the foundation time to set, to sink in, to adjust and do its thing.

12. Take time to apply. The magic is just as much in application as with the products.

Too Much Information

Yes, the sponge is use and throw. But since I use it only on me, I wash it, store it in a Ziploc and use multiple times. Don't feel bad about wastage. You cant eat your cake and have it. Or something like that.

When you use blow dryer over the foundation to make it more manageable, wait until it cools down before you use it on your face.

There are twelve steps. Not ten but twelve . Ten is the norm. But, I am not the norm. I am twelve.

When I say take time , I mean take time. Behind every face that needs full coverage foundation and has a full coverage foundation looking flawless - there is precisely 246713 hours of clocked practice time behind it.

That person who avoided the ex boyfriend at the party last year was not me.

Did I mention my mom reads my blog ?

Love,
Indian Girl

New Superbalanced Powder Makeup SPF 15 - Review & Swatches : The Best Powder Foundation For Dry Skin

Five things that are steady in my life are

Dry Skin

For Donuts

Dry Skin

For Tall Boys

Dry Skin

With so much dryness I stay away, far away from powder foundations when I'm going on dates with tall boys at Dunkin Donuts. Hey I'm all about the steady !

Even if I do use a powder foundations, its usually over my liquid foundation, just to help set it. And this is done with minimum usage of powder.

All this has changed since the New Superbalanced Powder Makeup SPF 15 entered my life. To retweet my tweet - This is stuff makeup dreams are made of. I have exceptionally dry skin around the inner corners of my eyes and on the top of my cheeks. So dry that you can name these areas as deserts on the map of my face. Almost always I dab on a little extra moisturizer just on these areas after applying foundation to avoid the appearance of foundation full circle around the dry skin.


Twist , Twirl and Apply !


Not only do I don't do this extra step anymore, I don't even reach for my liquid foundation. I twist, twirl, apply and I'm done. Its that easy ! Its beyond easy, actually ! The Clinique Super Balanced Powder Makeup comes with a super fantastic grinder that dispenses just the right amount of powder for one application. You move the dial just about 1 cm or so and that should do it. Next I twirl my Kabuki brush in the compact and apply it all over my face and neck. That's it !

Its Smart !

The powder comes with something called Smart technology that keeps dry areas comfortable, oily areas less shiny. I trust this technology. The foundation does not gather around my dry skin. No more foundation full circle. In fact it glides smoothly and stays on for at least five hours without the need for retouching. If I'm looking for longer stay I apply my favorite primer before applying the powder and I'm set for the day !

Finish & Coverage

The best way to describe its coverage is light weight medium coverage. It feels light or lighter than a tinted moisturizer on my skin but the coverage is a brilliant medium ! Because it is so light, the finish is extremely natural. If you are looking for something to give you a natural & comfortable finish like a tinted moisturizer but want a little more coverage , you should check this out. You'll love it !

The brush it comes with is bad. Its rough and not a good match for the fabulous powder. However I do keep it in the compact because more often that not I forget to carry my kabuki with me and this comes in handy.


Overall at $34.50 it is a little more expensive that most other powder foundations but I've never been this satisfied with any other powder. So, until something else sweeps me off my feet - this shall be my Holy Grail powder. Also for $34.50 we get 0.63 oz of the product while a MAC Mineralize Skin Finish Powder Compact retails for $25 and you get only 0.35 oz of product. If size is taken into consideration, its a very good value for money. The shade #4 Natural is uber perfect match for my skin tone. And when we find something that is this uber perfect - we cling on it for the rest of eternity.

Oh wait, so that makes this product another steady in my life, right ? Like I said, I'm all about the steady !

Price - $34.50 (0.63 oz)
Purchase
- Nordstrom, clinique.com, macys
Purpose
- Mineral enriched powder foundation with SPF 15
Position
Love,
Indian Girl

How To Get The Naturally Glowing Dewy Makeup Look : Tutorial

The past ten days or so have been awesome makeup wise. I started working on this tutorial and as part of it I was testing out various ways of wearing the look and to perfect it. Everyday I changed a little something and saw how much of a difference it made and finally when I was happy with a routine I decided on putting it up for you guys to try !

The Quest For The Perfect Products

It all started almost two weeks back when I made a trip to Macy's to decide on the products that would give me what I was looking for.There are several tutorials online and most of them are just a repeat of another. The same products, the same brand, same routine. I wanted to come up with an original look that was not only basic and super easy to replicate but also use products that were easily available, would suit people who were prone to makeup allergies, sensitivity to fragrances, one that did not burn your wallet ( as much) and of course no limited edition stuff.

After making rounds of several brand counters I zeroed in on Clinique. Its not only a brand that I love but they also happened to have everything I was looking.
Allergy tested - check
Fragrance Free - check
Product Availability - check
Decent Price Tag - check
Easily Available - check

Remember ...

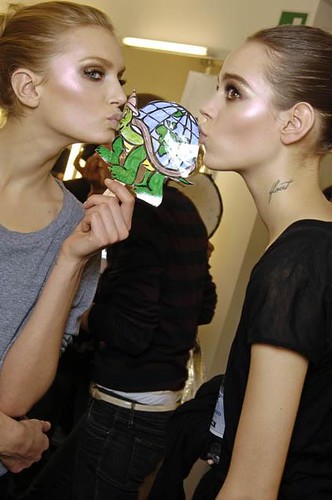
I am going to start off with step by step instructions on how to do the dewy look. I have also scattered some cute pics of models with pretty makeup on. For real life, a toned down version of it will kick a$. At the end of the steps I have added several alternatives to the look. Healthy skin is the key but all of us have some issues or the other so I am only going to talk about how one can use makeup to create this look. One must remember that each of have different types of skin, different needs from makeup, different comfort levels with makeup and a different idea of what dewy is. This is a look I came up with that has worked very well on me and its something to get you started on. Change it up, play with it as per the demands of your skin.
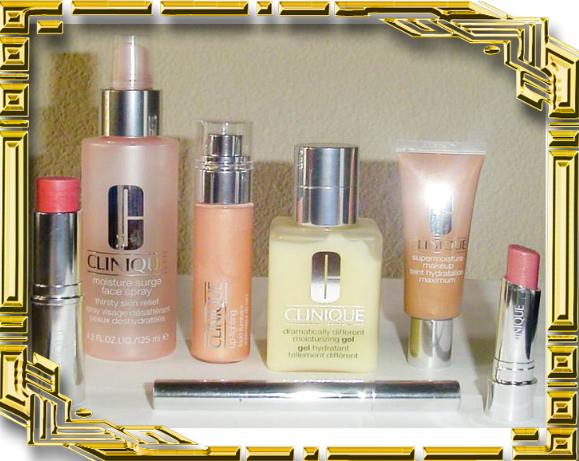
Products Required:

Moisturizer : Clinique Dramatically Different Moisturizing Gel
Face Spray : Clinique Moisture Surge Face Spray
Foundation : Clinique Super Moisture Makeup - 12 Warm Caramel
Highlighter : Clinique Up- Lighting Liquid Illuminator - 01 Natural
Cream Blush : Clinique Blush Wear Cream Blush - 02 Peachy Blush
Mascara : Clinique Naturally Glossy Mascara - 01 Jet Black
Lipstick : Clinique Butter Shine Lipstick - 438 Baby Baby
Concealer : Three Custom Color + Jouer
Makeup Wedges


Step by Step Tutorial


1. Start off with a clean face and hands.
2. Apply Dramatically different Moisturizing Gel all over your face.
3. Wet the makeup wedge with water and squeeze out the water.
4. Spray the Moisture Surge Spray onto the wedge and dab it all over your face.
5. Apply concealer under your eyes and on the lid if necessary.
6. Take the required amount of foundation onto the back of your hand. With the same wedge apply the foundation all over your face and neck using dabbing motions.
7.. Spray the Moisture Surge Spray on the other side of the wedge and dab it again all over your face
8. Let the foundation set for a minute.
9. Take some cream blush on your finger and dot it on top of your cheeks. Use the wedge to dab it on the apple of your cheeks.
10. Take just a drop of the Uplighting Liquid Illuminator on the back of your hand. Working with some of it at a time, dab it along the bridge of your nose. Next dab some of it on the 'C' shaped area along the outer edge of your eye extending it to the top of your cheek bone.
11. Apply some of the Liquid Illuminator under your brow bone and on the eye lids.
12. Curl your lashes and apply the Naturally Glossy Mascara.
13. Apply the Butter Shine Lipstick - baby baby
14. Spray some Moisture Surge Spray onto the wedge and very lightly go all over your face with it.
15. Admire that translucent glowy face of yours.

Deconstruction

The key to the dewy look is hydration. Dabbing the Moisture Surge Spray helps keep your skin constantly hydrated and reinforces the moisture with every repeat application. The Dramatically Different Moisturizer is a gem of a moisturizer especially under makeup. Thanks to you guys for recommending it to me. The Clinique Super Moisture Makeup is so wonderfully moisturizing and not one bit oily. It has a sheer to medium coverage, works very well for normal to dry skin and wears well for at least 8 hours. The Uplighting Liquid Illuminator in Natural is just that - naturally illuminating. Applying it on top the cheek bone and the bridge of your nose is the key to an over all glow. These are the parts of one's face that stand out and reflect light so adding a bit of an illuminator here is enough to make your whole face look radiant. The creme blush if dabbed in excess can be quite pigmented. However in the end going over the whole face with the moisture spray, takes care of excess of anything and brings the whole look together.

Alternatives

- If you have very clear, even and don't use foundations, mix a bit of the illuminating liquid in your moisturizer and apply all over face for super radiant complexion.

- If you have a problem with acne or pores, apply a face primer after applying the moisturizer. Let it set for a minute and follow with foundation.

- If you have a very very oily face apply a face primer after applying the moisturizer. Follow with your regular matte, oil free foundation.

- You can also mix a bit of the liquid illuminator with your foundation and apply all over your face.

- You can also use water in a spray bottle instead of the Moisture Surge Spray. No spray bottle - no problem, just sprinkle a few drops of water onto the wedge or directly onto your face.

- A skunk brush can also be used instead of the makeup wedge.

- For this look, I would avoid powder anything - powder blush, translucent powder, powder foundation, powder highlighter. To me powder takes away from all the dewy-ness but then again, to each his own.

I was extremely satisfied with how this look played out - its dewy, glowy, hydrated, everything is in right amount, nothing in excess, natural yet put together. Its all about effortless sheer luminosity ! I cant talk enough about the Super Moisture Makeup. After being a slave to Tinted Moisturizers for ever, I took a step forward to a medium coverage and couldn't be more happier with this formula. Surprisingly it is more natural looking and has me feeling extremely comfortable. It is so light, I can barely feel it on my skin ! Overall - super satisfied !

Your Turn


Now go on try it and let me know how it works out for you. I am dying to hear from you guys. Sorry it took me a while to answer this most requested look but I was trying to perfect it before I showed it to you guys. Am sure you will be happy with the results. Like the tutorial ?

Love,
Indian Girl

Makeup Sponge / Wedges - Where have You Been All My Life ???

Why hasn't anybody told me about these wedges ? I am mad . Why is everybody keeping the secret to themselves ?? We all need to look pretty ..not just you. You; with the secret !

Ugh.

Anyways you couldn't keep it from me for long. I discovered them recently and I am all over them. These makeup wedges are the easiest most efficient tools to apply makeup. I hardly use my foundation brushes anymore. In fact with just this one wedge I can finish my whole makeup routine. Its that powerful and multidimensional ( can this word be used here ? I can never tell...)


I bought these wedges at Big lots for $2. Two dollars for 32 wedges. Each wedge can be used for two applications if stored in a Ziploc. I personally use one side on day one and the other side on day two. Sometimes I use a wedge just once - highly recommended. Always look for Latex free ones. I did not but got latex free ones, so that's good. Some people can get a severe allergy with latex sponges.

So, this is how you use it. Take a wedge, wet it, squeeze it to take the water off. Dab in foundation and dab all across your face. Now take some concealer on the wedge and use it under your eyes, over your eyes and everywhere else needed. You hold the thicker side of the wedge and use the thinner side to apply anything and everything. It bends, squishes, molds - does it all.
And did I mention, $2 . I then use it to apply my cream blush and cream highlighter. All done in dabbing motions. So much less pressure on your skin yet the effect is equal to airbrushing.

In between each step sometime I like to wet the wedge with Clinique Moisture Surge Face Spray and dab it all over. Other face sprays or water can also be used. Yeah that article is coming up next - The importance of water in makeup. Seriously all these secrets I am discovering are amazing !!!

Try these handy wedges and lemme know how it works for ya

Love,
Indian Girl

Glo Minerals - Glo Pressed Base : Review

Hello Ladies !

Blogger is so weird. The schedule post option isn't working and none of my scheduled posts are getting published on time. I'd like to say this is the reason I missed our Monday Makeup Tip post, last week, published it on Tuesday this week and get over it. Boy, does it feel good to blame blogger for my forgetfulness !

Have You Tried Mineral Makeup ?

If you usually have a hard time finding a foundation, I highly recommend checking out the mineral makeup companies out there. Most of them usually have at least twenty or so shades in their foundation lines and some even custom make a foundation that's perfect for you ! I will soon make a list of popular mineral makeup companies for y'all so you can check them out to satisfy your foundation needs. However most of these companies only make powder foundations. So, that's the catch #1. Catch #2 is this - most only make loose powder foundations. So that's that. I personally think storing anything loose is a pain and refrain from buying them most often.

Glo Minerals - Glo Pressed Base($39)


I recently tested out the Glo Pressed Base from Glo Minerals. It is a pressed powder foundation. So catch #2 is no longer a catch here. The pressed base comes in 21 shades. I had a tough time choosing a shade because I get lost when I have too many choices. Am I honey? Am I golden ? Am I natural ? Personally I'd love to be a natural golden honey but unfortunately that shade name does not exist. So I went for a honey medium.

Honey medium turned a little too honey-ish for me. May be I should have picked one of the golden shades. But lets talk texture. The coverage is plenty ! I never expected a powder foundation to give such a full coverage. Its plenty-full coverage, man ! The finish is more matte than satin. Since it is matte, if you get a darker shade it works well as a contouring product. Always remember to use matte shades for contouring or the effect will be a shiny disco-y bally-y.


Overall I love that the brand makes so many shades, most of which are in the medium - dark category. It is definitely something you should consider if you are looking for a matte , full coverage, mineral pressed powder. As for me, you know IG and full coverage arnt really best friends. As with most foundations, ordering online is a difficult thing. The Glo Mineral products are said to be available at several salons and spas through out the country and you can find testers at some of these locations. I could not find a list of the spas that carry Glo Minerals online. If I get any more info on this, I'll keep you updated.

I Was Featured On Thevi Cosmetics Blog !

Thevika from Thevi Cosmetics featured AIMB on her blog this week ! She had such wonderful things to say about AIMB...It meant so much to me. You know how I usually keep my bidness out of the blog and only talk about beauty. But this week has been beyond awful. Hence the lack of posts too. Seeing that somebody like Thevika , an awesome entrepreneur had such nice things to say about AIMB makes all this so much more worth it ! You can read the feature here.

Wait, therez more. Since I'm the featured blogger for Thevi this week, we'll soon be having a Thevi Giveaway ! Come back tonight for more ( on the giveaway)

Love,
Indian Girl

Rock & Republic Classic Tinted Primer SPF 20 : Review

Rock & Republic, SPF 20 and a Matte finish. Now tell me how am I suppose to keep away from trying this stuff ! The lack of shades could have stopped me but Sophia was right up my alley ! Now tell me again, how am I suppose to keep away from trying this stuff !! I'm only human you know. And one without a tinted primer at that.

Sheer & Light

The Rock & Republic Tinted Primer ($46) is made for summers like these and people like me. If the thought of makeup repulses you with the rising mercury then its time you became best friends with super sheer, matte, light formulas like this one. When I tried Becca Luminous Skin Colour I left like nothing could be lighter but clearly there is and it comes in a classic black bottle ! I love the feeling of not feeling it on my face. Plenty of women don't wear makeup even if they wanted to because of the heavy nature of it. Formulas like these can get anybody comfortable with the idea ! It evens out my face, balances the red on my cheeks and gives me some overall color. Its not one for coverage of any kind.

Another important thing is that its silicone free. A silicone free primer !

Even & Smooth


And since its a primer, it leaves my face feeling soft and even ! I usually don't apply powder on top but if you wanted to , it makes a perfect smooth base for powder application. Also when they say matte , I think they mean - not shiny or glowy. Because its not super matte. It does not look dry and powdery. Its just not glowy or shiny and is very natural looking. The only catch is the lack of shades. Its sheer so you can try and fit into one of the four but there is only so much fitting one can do. I hope they expand their line with more shades so many more women can get experimenting on this good stuff !

Love,
Indian Girl

Not That Anyone Has Asked, But...

The bloggers that were featured in August's Allure were asked for their list of ten favorite products. Apparently, some of those lists were slightly altered (read this post by the Beauty Addict), but they did get to name their absolute favorites. So I've been trying to compile mine. It's not as easy it seems. I'm sort of cheating, as in certain places I picked a whole product range. But, it's my list so I make the rules...

1. Leave-in conditioners. There are several on the market and I alternate between a few. It doesn't really matter which one I use, as long as my hair gets its moisture fix. My favorites are Aveda Elixir and Neutrogena Triple Moisture Silk Touch.

2. Body washes and creams from L'Occitane. I love everything that they make, in every fragrance and line. The shea butter products are wonderful in winter, mimosa is a dreamy summer scent and I also adore the Honey Harvest line. Their web site is horrible, though. You need to know exactly what you're looking for, otherwise you'll miss most of the products. So I highly recommend a trip to their nearest store.


3. Bliss Sole Train set. Everything one needs for feet (except for polish). The Diamancel Buffer is amazing (they also sell it on Drugstore.com, and their lotions and potions are wonderful. I only wish it all smelled like Rosy Toes. What's better than having your feet smell like roses?

4. Mario Badescu's seaweed night cream. I've talked about it before and can't say enough good things about this product. They sell the entire line in Nordstrom, and I also recommend taking their consultation online, because in a few weeks you will receive an envelope full of samples of products recommended for you. That's how I became a fan of their products.

5. Lancome eye liners. If I had to choose only one eye makeup product, it would have been eye liner, and if I had to narrow it to one brand it would be Lancome. The pencils and liquid in a pen are all beautiful, durable and easy to use.


6. Chanel Vitalumier foundation. I haven't succumbed to the mineral trend. I like the silky feeling of a liquid foundation and the fool-proof application. Vitalumier is semi-sheer. You get more coverage if you use more product. It blends well with my skin and has a lovely, natural finish. My color of choice is beige, and it's the best match for my skin out of the many products I've ever tried.

7. Dallas by Benefit. It's a blush and a bronzer. It gives my skin the perfect natural-looking glow and I have no idea what I used before discovering it. Well, I do know, but now I can't picture myself without it.

8. Besame Cosmetics Enchanting Lipstick in Chocolate Kiss. I've already declared it as my holy grail lip color. The more I use this reddish brown lipstick, the more I love it. It's very pigmented, the texture is perfect and the color is neutral enough to be wearable for either day or night, but still bold enough to be noticed and make a difference in my look.

9. O.P.I Start to Finish base & top coat. I've tried so many nail products. From the ubiquitous drugstore products to the top notch Lippman Collection. This is the best I've found. It's a 2-in-1 product that gives outstanding results. It makes applying polish a breeze and the manicure lasts for well over a week.

10. Perfume. My mother has taught me that you should never leave the house without putting on some perfume. I also wear it at home. It makes everything prettier and finishes off the look. I don't think that it really matters what anyone is using, as long as it's something they love and feel good wearing. I'm always looking for new ones, not as a holy grail thing, just building my fragrance wardrobe.