Showing posts with label Eyes. Show all posts

Kenzo Belle De Jour Angel Eyes : Review - The Best Eye Cream Yet

So, in this day and age lucky are those who don't sit in front of a computer all day long drying their eyes out. Putting our eyes through maximum stress day in and night out. Also all that squinting you do when you are really concentrating along with dry eyes - hello early wrinkles !

The Dry Machine

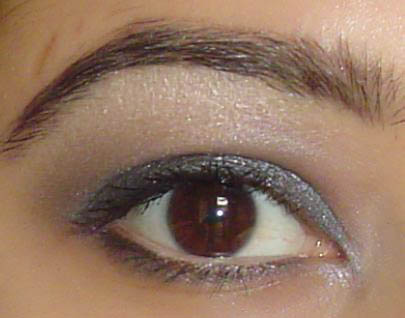
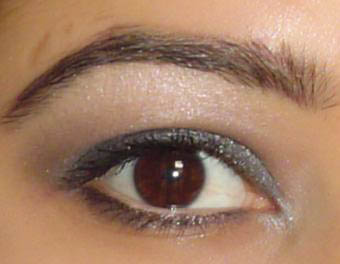
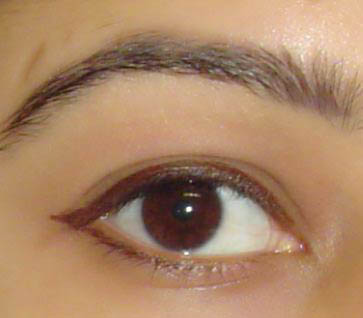
I don't know if it was all the computer-ing or the fact that it was a cold cold winter or a deadly combo of the two but the skin around my eyes were parched. Especially the area at the sides of my nose / inner eye corner - supreme dryness. So much that I refrained from any eye makeup for the longest time . I wasn't doing any eye elated thingy for the blog either - how could I with the grotesque concealer settling onto my dry skin.

Project Combat The Dry Machine


After my Biore eye cream didn't do much to rescue me , I discovered Kenzo Belle De Jour Angel Eyes. The first time I tried it - I knew it was gonna be a hit. Angel eyes is suppose to have reduced the stress inducing hormone cortisol by 13 % in a single use among the test group. Now 13 % was a claim I was ready to believe as oppose to some mascara companies - 200 % more volume stories.

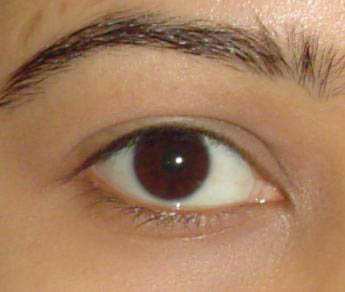
In a week of using this velvety cream every night, my dryness cleared out. And the knowledge about the cortisol made me feel calmer like my stress was really draining out. Its got a very mild relaxing scent of white lotus flower.

Its A Luxury Of Sorts
That being said it is an indulgence, a luxury even at $70 - 0.5oz. For comparison the popular Clinique Repairware Intensive Eye Cream is priced at almost $40 - 0.5 oz.

Since starting out on eye creams a few years back , I've tried more than I'd care to count. But this one stands out - its the best I've tried yet. If you are heavy on cash and are looking to make yourself a lil more happy - look in the direction of the Kenzo wall at Sephora. You wont regret it. I wake up feeling thoroughly hydrated and replenished ; ready to combat another day in front of the dry machine called computer.

Mark It Kit Trend Color Compact - Review & Swatches

I love kits and palettes mostly because they are a great value for money ! If I was someone who traveled a lot - I'd probably love it for that too.

Often I get questions from readers looking for a great everyday kit that they could just throw into their bags and head out. Other times I get asked about kits for beginners who want a little bit of everything in a small, compact, non-overwhelming form. And then there are kits that need to be given as gifts. When you are traveling to India to meet with relatives / spend some time in Des you take gifts for relatives - all Asians do this. And I get a lot of questions from folks traveling to India / Pakistan / South Asia in general requesting recommendations on mini makeup kits that they could give as gifts.

In short - there is a huge demand for mini all in one kits.

I have one kit here that satisfies all of the above needs - The mark It Kit Trend Color Compact. At $20 its a cute little thing that packs a lot !


Its a flip compact - as in you have a few things on one side and you flip it to find few more things.
On one side are three eye shadows (black, grey, beige) and an almost matte bronzer.

On the other side we have three lip glosses ( mauve pink, fuchsia, clear shimmer ) and three triple use color creams ( deep pink, bronze taupe, light pink).

Over all its a very well thought out palette. The eye shadows come in a decent size - not those tiny squares that wont even fit your finger. The three shades should look good on most skin tones and are versatile enough for day and night. The bronzer is good for some color / for contouring.

But my most favorite part is the other side with the lip glosses and creams. The creams can be used on eyes / lips / cheeks. I love using the deep pink color on my cheeks and using the light pink one as a highlighter under my brows, on top of my cheek bones / on the bridge of my nose. The bronze taupe I use on its own all over my lids. When I apply a thin layer it doesn't crease much and gives just enough color for day wear. Combined with some black shadow along the lash line and mascara - I'm good to go !

The lip glosses are not deeply pigmented - all three are sheer. The fuchsia pink gives the most color to my lips but the mauve pink is my favorite for day. It has a gorgeous shine that though not long lasting looks incredible the short time that it stays on. For longer wear and more color I've started applying the deep pink creme color on my lips and topping it off with any of the glosses - too cute !


My only complaint is the slightly sweet taste of the glosses. I don't really lick my lips or eat lipstick but the one time I just happened to...the sweet taste reminded me never to. None of the products have any scent, which is great coz my olfactory senses drive me crazy. And the lid has a hollow design so your lip gloss wont get on the lid of the compact. Messy compacts are yuck.


Overall - its a very handy kit ! This is my first time with a mark product and it has managed to get me interested in the brand.

St. Patricks Day - Green Eye Makeup Tutorial

The new camera arrived yesterday and I got to work immediately with some green looks for St. Pat's day ! Gosh, I've thoroughly missed swatching, doing looks and everything else !

As far as the camera goes. I am still not completely convinced with it ( Samsung SL 420S). The face shots are fairly good but product shots are very very bad. Given how that is what I will mostly be doing with it - I am a little worried. Plus the camera was suppose to have Schneider lens but it had Samsung Lens. I will play around a little more and if I'm not convinced it will have to be returned...

This is how I went about doing this look

1. Start off with concealer and set it with some powder.
I used Smashbox HD Concealer & Cover FX Translucent powder

2. Apply a green / black cream shadow all over the lid.
I used Julie Hewett Creme Shadow - Malachite

3. Pat on a dark forest green color all over the lid.
I used Nixie green ( I don't know the shade name )

4. Use a pistachio green along the cease and blend into the forest green
I used Nixie again

5. Apply a white gold shade under the brow as highlight.
I used Julie Hewett Eyeshadow - Silk

6. Apply a green glitter eyeliner along upper lash line & a copper shade along the waterline
I used Urban Decay Glitter Eyeliner- Stagediva & UD 24/7 liner - Lucky

7. Line lower lash line with a hint of both green - forest & pistachio

8. Do your brows, apply mascara and you're done !

For the lips I chose Hard Candy The Painted lady Lip Color Lipstick - Crush. Its a gorgeous warm golden pink . A great shade to pick up form the Hard Candy line ! Its very moisturizing and has lots of pigment to it !

Hard Candy Walk The Line Liquid Eyeliner - Dream Girl

Two more Hard Candy Walk The Line Liquid Liner Swatches. I wrote about Licorice (shiny black) & Praline ( brown bronze) a few weeks back.

My thoughts on these two are similar to the others I've tried - great for the price ($6). Great even otherwise. The only problem is the dry time. Between Dream Girl - yellow gold and Night Sky ( sparkling gray) , Dream girl dries in a few seconds while Night Sky takes a lot more time. That being said Night Sky is uber
gorgeous - literally like a night sky with stars twinkling. Draw a fairly thick line for more its beauty to shine through. Dream Girl is too gold-y for me but when I do heavy looks I know I'll reach for it.

They are available at Walmart.

Without flash

With Flash

Easy Wedding Eye Makeup Look

I've had this picture of Eliza Dushku forever ! Aint it simply gorgeous ! The hair, the nude lips and the dress - just perfect.

I was inspired by the eye makeup in this picture to do a soft eye make up look for brides. It is great for any other occasion too ! For a look similar to Eliza's I'd pair the champagne & black eye look with Illamasqua Blush in Create and a nude Lipstick like Julie Hewett Lipstick - Biba (swatch below)


Julie Hewett Lipstick - Biba


Lemme know if you'd like a tutorial. I'll have it up soon !

In Other News

Thanks to @phillygirl on twitter I discovered this amazing Hindi a cappella group - Penn Masala. A group of 13 or so boys err...men. They have the voice of angels...
Cant wait to go to one of their concerts !

Hard Candy Walk The Line Liquid Eyeliner - Praline & Licorice : Review & Swatches

Hello !

Long time no see ...

Your girl here has been havin hella fun with her two best friends. I met up with one after two years. The last time I saw her , she was three months pregnant and now I got to meet her two year old boy ! More on that laterz...

Lets get to matters of makeup.

Cheap effective makeup.

Cheap effective makeup that's available and Walmart.

Cheap effective makeup that's available at Walmart and costs all of $6 - The Hard Candy Walk The Line Liquid Eyeliner.

The two shades I tried were - Licorice & Praline.

Licorice is more like oil slick - a shiny black with some blue green sheen / sparkle to it. Praline is a brown bronze.

The eyeliners are some brilliant stuff for the dough. They last all day without cracking or disappearing. Licorice takes a while to dry but once its dry - all is good. Praline has a lot more staying power than Licorice and is a great shade to venture into if you've stuck with regular blacks and brows.
The eyeliner has a great brush that allows for the thinnest lines possible. The thin brush also allows to create cute, tiny little flicks. Only major issue for me was Licorice's drytime - foreva. So, I reach for Praline a lot more...

What's happening with you guys ? Anyone checked these eyeliners out ?

Love,
Indian Girl

This article contains a sample product sent for consideration by PR. For more details on the disclosure policy please refer to it at the bottom of the page.

Nude Eyeliner For Women With Dark Skin Tone

More like nude eyeliner inspiration.

The moment I put up this look up I got several emails from y'all telling me how the nude eyeliner did not work on you because your skin tone was medium dark - dark.

A white eyeliner is traditionally used to make eyes look bigger and the whites of the eye, brighter. Nude eyeliner serves the same purpose as a white one. While white makes for a stark contrast against medium / dark skin tones , the nude eyeliner softens the look while still managing to make the eyes look fresher, bigger & brighter.


The key is to apply the nude eyeliner just on your waterline and make a thin line at that. The moment it becomes a thick line that runs from waterline onto the lash line - its starts looking odd and almost ghost like.

I use the Julie Hewett Pencil in Omit - its a concealer pencil but its the only one that stays put for real long on my waterline and looks natural on my skin tone (NC 40) . If you have fair / light skin try a white pencil - Julie Hewett Hue Pencil - Aurora. It will give you this angelic / snow bunny like look. Other nude eye color options are Stila Kajal Eyeliner - Topaz.

And if you are still not convinced, check out the gorgeous Rachel Roy. This talented lady rocks the smokey eye with nude eyeliner ! The absence of a dark eyeliner on your waterline makes a huge difference . It makes me look a lot more fresher and lot less made up. Perfect for day time !


Love,
Indian Girl

Beginners Easy Brown Eye Makeup Look : Video Tutorial


Another video !

I still am a long way from doing a great job in videos. But am learning ! You'll see me go up and down depending on how straight I'm sitting. My mirror also kept falling off and I kept going away from the video frame in search of my mirror. You'll notice some quick shots - too quick. All noted and will slowly be improved on for next video.

Making a video is not easy man. Much respect to all those who do it so right !

This one is an Easy Brown Eye Makeup Look for beginners to play with !
No crease, no inner corner, outer corner complications. Its simple and straight forward. Takes all of four minutes to do !

Do me a favor and don't enlarge it to full screen - the quality reduced 100 times and its just weird seeing such a big eye.

Hope you guys enjoy the video !


Brushes :

Trish McEvoy Flat Eyeshadow Brush #21 - for laying the first brown eyeshadow from twilight palette
Fluffy pointed blending brush ( Smashbox Crease Brush #10) - for applying the second golden brown color from NIXIE
Smashbox Double Ended Smudger Brush #20 - for applying black eyeshadow as liner along upper and lower lash line.

CVS has a set of brushes called Essence of Beauty brushes - they are equally good & are budget friendly. I love them !

Love,
Indian Girl

Reader Question : How To Make Your Eyeliner Stay On All Day / How To Prevent Eyeliner From Smudging

This is one of my most asked questions so I had to get it answered on the blog ASAP ! Most recently this question came from reader Farheen

"Thanks for tackling the long wear makeup question. your answer was so help I used the tips you gave and I swear my makeup stays on 4 times longer at least!

The only thing i have noticed is this: when I apply pencil eyeliner on the bottom lid or waterline as they call it, it bleeds in half an hour all under my eye. it takes with it my under eye concealer and everything. I look like a panda! please help
"


1. How can I make my eyeliner stay on along the waterline all day ?

We cannot. It is the waterline and eventually our eyes will get what ever is on it out.
Unless - the eyeliner you use on your waterline is waterproof and sturdy. Even then do not expect for them to stay on for longer than four to five hours.

2. Whenever I apply eyeliner on the waterline, they bleed out and I end up looking like I have dark circles at the end of the day.

I have plenty of tips that I follow to avoid this :

- Start off with a concealer. If you already have dark circles around the eyes - do not go for a heavy eyeliner look. It makes things look worse.

Instead apply concealer and mask those dark circles. Now we have an even toned surface to start with.

- Use a waterproof eyeliner pencil or creme eyeliner pencil along the upper lash line. Smudge it out a little bit. Now apply a thin layer of powder eyeshadow in a similar shade over it and gently smudge.

- Setting with a powder eyeshadow is essential to keep the creme eyeliner in place. Just as we set liquid / cream foundations with translucent powder , we need to set our eyeliners with powder eyeshadow for longer wear.

You can also draw a line along your lash line with a pencil liner. Go over it with a creme liner and finally set with eyeshadow if you want it stay put for 8 - 10 hours.

The lower lash line & waterline - these are mostly responsible for the dark circles look.

- Line your waterline with a water proof pencil liner. Make it just one layer - do not go over it multiple times.

Now close your eyes so the eyeliner gets transferred to the waterline along upper lash line - easy breezy tight lining. Go over the waterline again with a waterproof pencil liner. Make it just one thin line. The more you cram into the waterline the more the goop that gathers along the corners of your eye.

- Line the lower lash line, using a waterproof creme / pencil liner.

- Set it with a thin layer of powder eyeshadow. Gently smudge.

Apply flake free mascara. Finally apply translucent powder under your eyes.

That's it !

Key Pointers

Contrary to what one might believe applying a thick layer of eyeliner is not going to make it stay on longer.

Multiple thick layers in one go, along waterline is the worst because our eyes push the product out and we end up having a lot of messy liner issues. Instead apply a thin layer and reapply another thin layer when necessary.

Layering is key for long stay. A couple of thin layers set with powder stays on without smudging longer than one very heavy dose of eyeliner.

Keep Q tips handy.

Products That Work For Me

Estee Lauder Gel Eyeliner
Urban Decay 24/7 Eyeliner Pencils
Julie Hewett Too Good To Be True Eyeliner Pencils

Other Options

One other product I've tried is the Becca Eyeliner Compact. It comes with a product called the Sealant. The sealant literally seals the eyeliner and prevents it from smudging. If you are going for the kohl rimmed heavy eyeliner look, I wouldn't recommend this product because it doesn't have that effect to it. Its more of a gentle everyday liner.

Guys ! Any product recommendations you have or any tips please let us know about it ! We have have our own ways of dealing with makeup mishaps !


Love,
Indian Girl

Reader Question : How To Apply Eyeliner ? Tips To Apply Eyeliner

I've tried to apply eyeliner several times but my eyeliner always comes out looking crooked. Help ! - Doli

How do you get your eyeliner looking so neat. Mine never does - Katie


1. Don't apply eyeliner when you are in a hurry. When I am rushing my hands are usually a bit shaky and unsteady.

2. Make your hand steady by placing your elbow on a table.

3. Dot the area along your lash line and connect the dots for a perfect line.

4. Draw the line in small strokes starting from inner corner moving outwards.

5. Use a creme or gel eyeliner with an angled eyeliner brush. They are more forgiving than regular liquid eyeliner bottles.

6. Try a pen eyeliner with felt or brush tip. What ever makes your skirt fly !

7. If you did use a liquid/ gel / creme liner and your line got a little wonky - let it dry. Once its dry, run a bit of powder shadow over it and smudge it out. Nobody will notice a crooked line underneath and the double layers will keep your eyeliner looking fresh longer !

8. Draw a light line along your lash line using a pencil eyeliner. With this as your base, you can now apply a liquid liner over it.

Practice will make it perfect with time. Eventually you'll be a liner queen !

Guys ! What tips do you have on eyeliners ? Do you have a product that helped you master the technique ? Dish ...


Love,
Indian Girl

Easy Almost Smokey - Black / Gray Eye Look With Estee Lauder Black Smoke Palette

The Estee Lauder Black Smoke Eyeshadow Palette was released December 2009, with their Blacker Than Black Collection. It is easily one of the best smokey eye palettes out there ! The shades are all very well pigmented , come in a sophisticated gold/blue EL packaging and the shades are classic black/gray.

Shades : satin bone, shimmery gray, satin gray, shimmery black.

This is an easy black/ gray almost smokey eye look I did with this palette. I used no eyeliners ! Well none other than the flesh colored one along the waterline. I think its less smokey and light enough for a regular evening ! What say you ?

Would you guys like a tutorial for the look ?


On my lips I went with Estee Lauder Long Wear Lip Liner in Spice, applied all over my lips. Its a gorgeous gorgeous shade if you're looking for a brown-rose kinda nude color on pigmented lips !

This is Spice with Julie Hewett Lip Lush in Tish - pretty sheer golden nude.

Love,
Indian Girl

Eye Makeup For Beginners - Chapter 1

Starting today I am working on a series of eye makeup posts for beginners. This series will mostly be a reflection of how I started out playing with eye makeup. They are simple eye looks to try out before going for a full on smokey eye.

I am hoping y'all will find it useful ! This and the next few others to come will be about playing with eyeliners.


There are several kinds of eyeliners in the market. There are gel eyeliners, creme eyeliners, liquid , pencil, powder eyeliners. For this look I prefer a liquid eyeliner. You can any others !

I used LORAC Front Of The Line Water Resistant Liquid Eyeliner in brown. It is now on sale for $10. Other liquid eyeliners I like are the ones from Prestige. L'Oreal, Revlon, Maybelline, NYC - everybody makes liquid eyeliners.

Brown is a great color to begin your eyeliner journey with. It is a little softer than black which might look too jarring if you're not used to seeing any makeup on your face !

For this look

1. Start from the inner corner of your eye and line along the entire length of your upper lash line.
2. Start from outer corner of your eye and slowly draw a thin line half way along the lower lash line.
3. Start from the outer edge of lower lash line draw a small wing upwards and outwards - done.

Winging is always easy when you start form the lower lash line ad move upwards & outwards. And remember as you begin, keep the wing small to very small. Its always easier to elongate one. If its too long, use a Q tip dipped in water / makeup remove t wipe off the length.

Related Useful Posts

Eye Makeup Application Areas

Prestige Liquid Liner

How To Apply Liquid Eye Liner

Winged Eyeliner - How To ?


Love,
Indian Girl

Bobbi Brown Tinted Eye Brightener - Review & Swatches

For Spring 2010 Bobbi Brown came out with these nifty little things called Tinted Eye Brighteners. The mantra for Bobbi Brown's Spring 2010 is - Look Your Best Under Five Minutes. The collection includes eye brow pencils, lip glosses and this under eye brightener.

If I had five minutes to do my makeup my routine would be :

Moisturizer
Eye Cream
Brows
Concealer
Lipstick
Bronzer

But then sometimes if I'm having a bad under eye circles day - then I run overtime with the concealer. Like ten minutes over time.

Never a good thing.

But wait , it gets worse when ten minutes later I still look like a girl who had solid dark circles, is trying her best to cover it up and failing miserably.

One word - Dadgummit .

Today is one of those days. My eyes look dull and the circles are a 7 on 10. Ten being the darkest they've ever been.

Ola caterpillar brows ! Not their best angle.

And this is my eye today with the Bobbi Brown Tinted Eye Brightener in Dark Peach applied all over my eyes and under my eyes. The inner corner are my biggest trouble spots. If I could I'd throw them in the naughty corner until they apologize and go back to being good.

Cant do. Super Nanny is of no help here.

But Bobbi is. Check that out !


I am ecstatic about the effect this brightener has. I look like I was born with zero dark circles. I look like people can envy me for my lack of dark circles. Oh its been a long time since anybody envied me for my zero dark circle eyes...

All it took was 30 seconds to apply. For a medium skin tone ( MAC NC 37 - 40) like me Dark Peach was an excellent shade match for a very natural finish. The formula is creamy but not thick. Its feels like I'm just applying a regular eye cream - easy and light !

The tinted eye brightener comes in eight shades. It costs a huge $38.00 for .05 fl. oz./ 1.5 ml of product. Bobbi Brown's Creamy concealer costs $22.00 for .06 oz./1.7g of product - almost same amount of product but much cheaper. So if you plan on checking this miracle worker out, make sure you find a MUA at the Bobbi Brown counters and get yourself matched in day light. If you're paying $38 you better get the right shade !


In Other News...

I'm obsessed with this JT + Timbaland song. Its super cute in a lyrics written by a five year old obsessed with Tacobell stuck in a thirty year old's body kinda way ...

What are you grooving your Wednesday to ?


Love,
Indian Girl

This article contains a sample product sent for consideration by PR. For more details on the disclosure policy please refer to it at the bottom of the page.